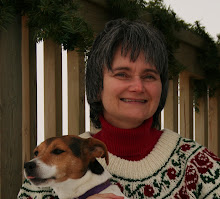
An art friend of mine, Tyna Silver, is holding her first solo exhibition and sale from April 24 to May 9 at the Foto Shop Gallery in New Liskeard. The exhibit is comprised of pastel portraits of children from around the world. The portraits are painted from photos supplied by Plan Canada (formerly Foster Parent's Plan). Tyna is a supporter of Plan Canada, and will be donating 30% of the proceeds from sales of the portraits to Plan Canada.
Read her press release for the full story behind the exhibition and sale.
Several of the portraits may be seen on the multi-talented artist's new website, but if at all possible do try to see them in "person" at the Foto Shop. They are hauntingly beautiful.
Saturday, April 25, 2009
Tuesday, April 21, 2009
Earth Day Sale!
In honour of Earth Day, I am having a sale in my Etsy Shop! On April 22, everything in my shop is 20% off!
In the top photo is a bracelet made from recycled vintage copper wire. Below that are my "Bark" rings, made from reclaimed sterling silver wire. Just a couple of the earth-friendly things I have available.
I do my best to nuture and celebrate our beautiful planet every day in my work and play, so I don't have any plans to do anything big tomorrow. I will probably just take my recyclables to town, and continue my never ending quest for earth-friendly, locally produced (in the broad sense) supplies for my studio.
How are you celebrating Earth Day?
Thursday, April 16, 2009
At the Bend in the Road
I'm happy to announce that "At the Bend in the Road" was accepted into the Temiskaming Art Gallery's Juried Competition! This is an annual fundraiser for the Gallery. Approximately 24 paintings are chosen to be in a day-planner that the Gallery sells to raise funds. The day-planners are beautiful, and a practical way to get a daily dose of the creative talent of our local artists!
There will be a showing of the art work featured in the 2010 day-planner sometime in the latter part of June at the Wabi Iron and Steel Gallery. I understand that the day-planners will be available for sale then. I will keep you posted as to the date and time!
"At the Bend in the Road" is an Acrylic and Ink Collage painting. It is based on a photo that my husband took on his way to a friend's farm on "Casey Mountain". I liked the view between the tall trees into the sweeping valley with it's golden fields sheltered by the hills and trees in the distance. The sun was just coming up, so the dramatic sunrise lends interest. I tried to capture the mist lying close to the ground, but I'm not sure I pulled it off. The tiny barn with the sunlight glinting off the roof is meant to be the focal point. I think I get away with that - just!
This painting is for sale, but can't be delivered until after the show in June - unless you live in the Temiskaming Shores area, then you can take it now as long as I can borrow it for the day of the show!
Tuesday, April 07, 2009
Wet Pastel Workshop - Waterlily Finished!
Here it is after adding some shadows, and removing some of the pastel on the leaves so the underpainting can shine through, and a bit of other tweaking. The photo isn't showing the brighter tones, the reds, yellows and oranges are much brighter than is being shown here - at least on my monitor, anyway. I am fairly pleased with it, and will put it away for a bit, then look at it again to see if it is worth selling.
I have some pastel portrait commissions waiting to be started. I think I will try this technique with them!
Wet Pastel Workshop
I recently had the pleasure of taking part in a one-day workshop with Diane Green, a well-known local artist, and experienced pastellist. The workshop was hosted by the Temiskaming Palette and Brush Club and was held in their club studio in Haileybury overlooking beautiful Lake Temiskaming.
I have worked quite a bit with pastels and have done some experimenting with them, including working with them "wet", but I was quite interested to see what Diane had to share with us.
I was very excited to see that we would be working on Wallis Pastel paper. This is a very heavy paper with a sanded surface that can take quite a beating - including wet washes. It is my very favourite pastel paper to work with, accepting many layers before becoming saturated. It suits my style of working with pastels perfectly. Unfortunately, it is very difficult to find in Canada. Thankfully, Diane had extra sheets available for purchase, so I stocked up!
After choosing an image to use (I chose a waterlily from one of my own photos - something fairly simple), we made some preliminary thumbnail and value sketches to fine tune the composition.
Next we transferred our final drawing on to our pastel paper with a pastel pencil. Diane then explained and demonstrated how to do the wet part of the process. She explained that we would be doing an underpainting by laying down colours, then wetting them with a brush. She chose colours that were much brighter, often complementary, to the dry colours she would be putting on top. They could be of a lighter or darker value than the top layer. The important thing was that they should help the painting to glow. Here is my wet layer:
The flower will be white and the leaves green, so I chose these colours for the underpainting. Hints of them will show through the top dry layer creating some vibrancy and interest. I'm not sure that I made the best choice for the leaves....
For the next step we added our dry layer on top, allowing the underpainting to show through in places.
Here I am making a start on the leaves.The leaves are mostly done, except for some tweaking. It looks like I got a little carried away with the dry top layer of pastels, and didn't leave enough of the underpainting showing. Oh well, one good thing about pastels, is that it is easy to remove! I have also started on the flower.
And here is the painting as it was at the end of the workshop. It still needs quite a bit of tweaking - more shadows, some reworking of the leaves, and no doubt some other things which will jump out at me once I get it home and see it with fresh eyes!
It was a very enjoyable day. Diane is a very enthusiastic and upbeat instructor, and it is always fun to see other artists and their work. Using pastels in this way will certainly add another dimension to my artwork.
I will show you the finished version of my wet pastel water lily in another post!
Subscribe to:
Posts (Atom)